Hello, lovely blogger friend's.
I'm here with my third, and final picture tutorial this week for Swedish House Crafts blog.
This time I have made a gift bag to hold 12 tea lights.
This time I have made a gift bag to hold 12 tea lights.
(If you don't have tea lights you could fill the bag with treats or a gift?)
Above is my completed tea light gift bag.
To make the bag, I used Maja Design "Joyous Winterdays" Outdoors 12" x 12" paper.
The pretty lace, pearls, and crinkled seam binding are from my stash.
The die cut lamp post is the new Tim Holtz Sizzix Bigz die.
In the above picture, you can see the side of the bag.
I used the die cut Christmas tree that was left over from the centre of the bag, and inked the edges with Tim Holtz Vintage photo distress ink.
I decorated the tree with 8mm, and 3mm white, and green pearl flatbacks.
I coated the tree with Snow -Tex.
For the arrangement I used a cinnamon stick tied with twine, and rusty jingle bells on top of a bed of green moss from my stash.
The wine coloured pomegranate apples, and wooden pine cones are from the store.
The arrangement is coated with Snow - Tex.
To make the gift bag, you will need;
Maja Design "Joyous Winterdays" paper
A die cutting machine that takes A4 card/paper
A score board, and a scoring tool
paper trimmer
Scissors
Hole punch
Pencil
Ruler
Glue
Acetate
Gummiapan Christmas tree die
12 tea lights, treats or a gift.
The tutorial.
Cut a piece of Maja Design "Joyous Winterdays" paper to measure 29cm x 25.5cm
Position the paper landscape on the scoring board, and score at 1cm, 3cm, 22cm, 24cm.
Position the paper portrait, and score at 1cm, 3cm, 22cm, 24cm.
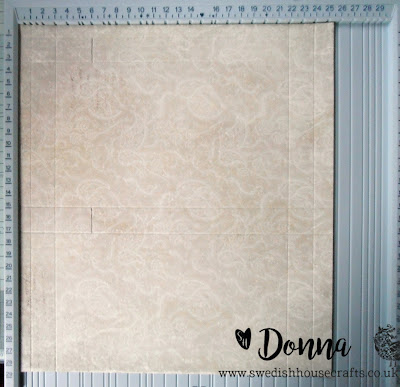
Keeping the paper portrait, you will need to score between the 1cm, and 3cm score line, and repeat again between the 15cm, and 17cm score line as shown above.
Position the paper landscape, and using a pencil draw a triangle in each of the rectangle boxes, and using a scoring tool, score on top of the lines. Rub out the pencil lines.
The above photo is how the triangles should look.
Keeping the card portrait, with the triangles at the top. Cut out the areas as shown above.
Next, cut the areas as shown at the top, and cut up to the second score lines at the bottom to make the tabs either side.
use a rounded corner punch to round the top, and bottom tabs.
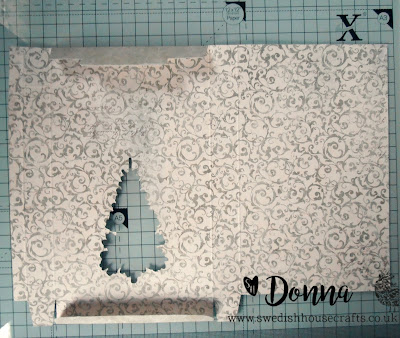
Position the Gummiapan Christmas tree die onto the paper with low tack adhesive tape, and run through your die cutting machine.
If you are using a die cut machine that takes A4 card, you will need to fold over the score lines top, and bottom of the tree before running it through.
Fold in all the other the score lines. The triangle score lines should be folded inwards.
Turn the paper over, and adhere a piece of clear acetate over the die cut tree.
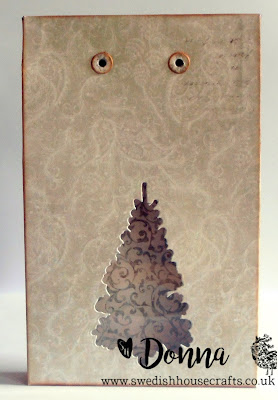
Measure 2cm down from the second score line at the top, and using a hole punch, punch 2 evenly spaced holes. The holes are to thread a piece of ribbon through, and tie into a bow.
Using distress ink, Ink the edges along the folded score lines.
I used Tim Holtz Vintage photo distress ink.
The bag is now ready to assemble
This is how the bag should look when assembled.
Decorate the bag how you wish!
I hope that I have inspired you to make a gift bag?
Links to the products that I used from Swedish House Crafts are listed below.
Crafty hugs.


Wow just love this you make it look so easy must try this out adore the tree and embellishments it’s just perfect my talented friend :) xx
ReplyDelete