
Hello, lovely blogger friend's.
It's official, Christmas 2016 has arrived.
I wish you all a very merry Christmas and a happy and healthy new year!
Here is my final Christmas card of 2016.
I have used another gorgeous image from Pion Glistening Season.
It's official, Christmas 2016 has arrived.
I wish you all a very merry Christmas and a happy and healthy new year!
Here is my final Christmas card of 2016.
I have used another gorgeous image from Pion Glistening Season.

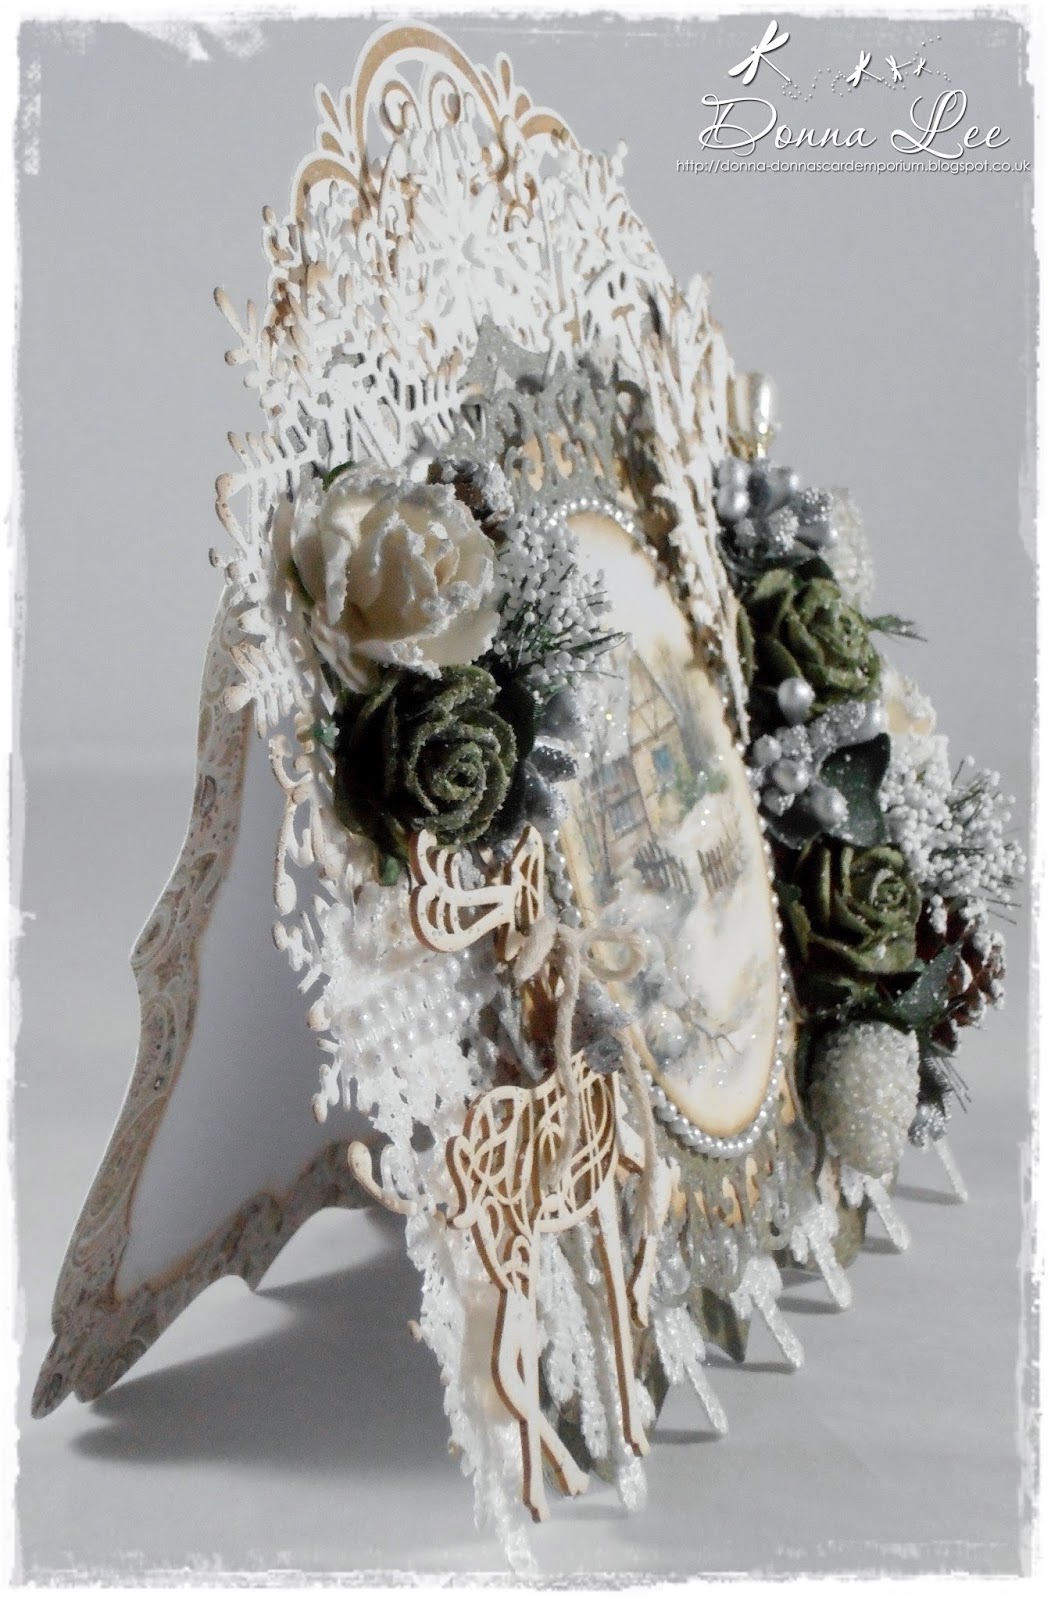
For the shape of my card I used GoKreate large frame frilly #2 and Maja Design
'Enjoying Outdoors' 6 x 6 paper stack from The Ribbon Girl
Other dies used are; Marianne Design Anja's Vintage decoration and Ivy circle. Spirit of Christmas snowflake border, Joy crafts Ice crystal circle, Noor! oval and Vintage flourishes holly leaves. Cheery Lynn French pastry doily and pine branches.
I have inked the die cuts with Tim Holtz frayed burlap distress ink.
The gorgeous 'Marie Therese' lace and double row pearl trim are from LLC

A close look at my Festive floral arrangements.
I used white flower sprays, larch cones, silver beaded berries, large frosted berries and Vintage pearl pin from LLC The 25mm olive green opens roses and 30mm light Ivory wild roses are from WOC.
I coated the arrangements with Snow - Tex.
I tied a bow with twine and a metal jingle bell to the Wycinanka reindeer's neck.

A close look at snowy Winter's cottage II.
The image and 2mm pearl bead string that I have adhered around the outside of the mage are from LLC
I used glamour dust on the snowy areas of the image to add some Festive sparkle.
Inside the card is decorated with design paper and the smallest of a GoKreate large frame frilly #2 die cut.
That's it from me..............I will be back next year!
I am entering my card into the following super challenge's
B) Louise's Bingo Board...............Metal Flowers Pearls)
J) Photo Inspiration Collage
Thank you for stopping by and big thanks for all the lovely comments that you so kindly take the time to leave. I appreciate every single one of them.
Have a wonderful Festive time.
Festive crafty hugs
Donna xx
🎄🎄🎄🎄🎄🎄🎄🎄🎄🎄


