Sunday 24 December 2017

A Surprise Merry Christmas And A Happy New Year From Swedish House Crafts

Hello, lovely blogger friend's.

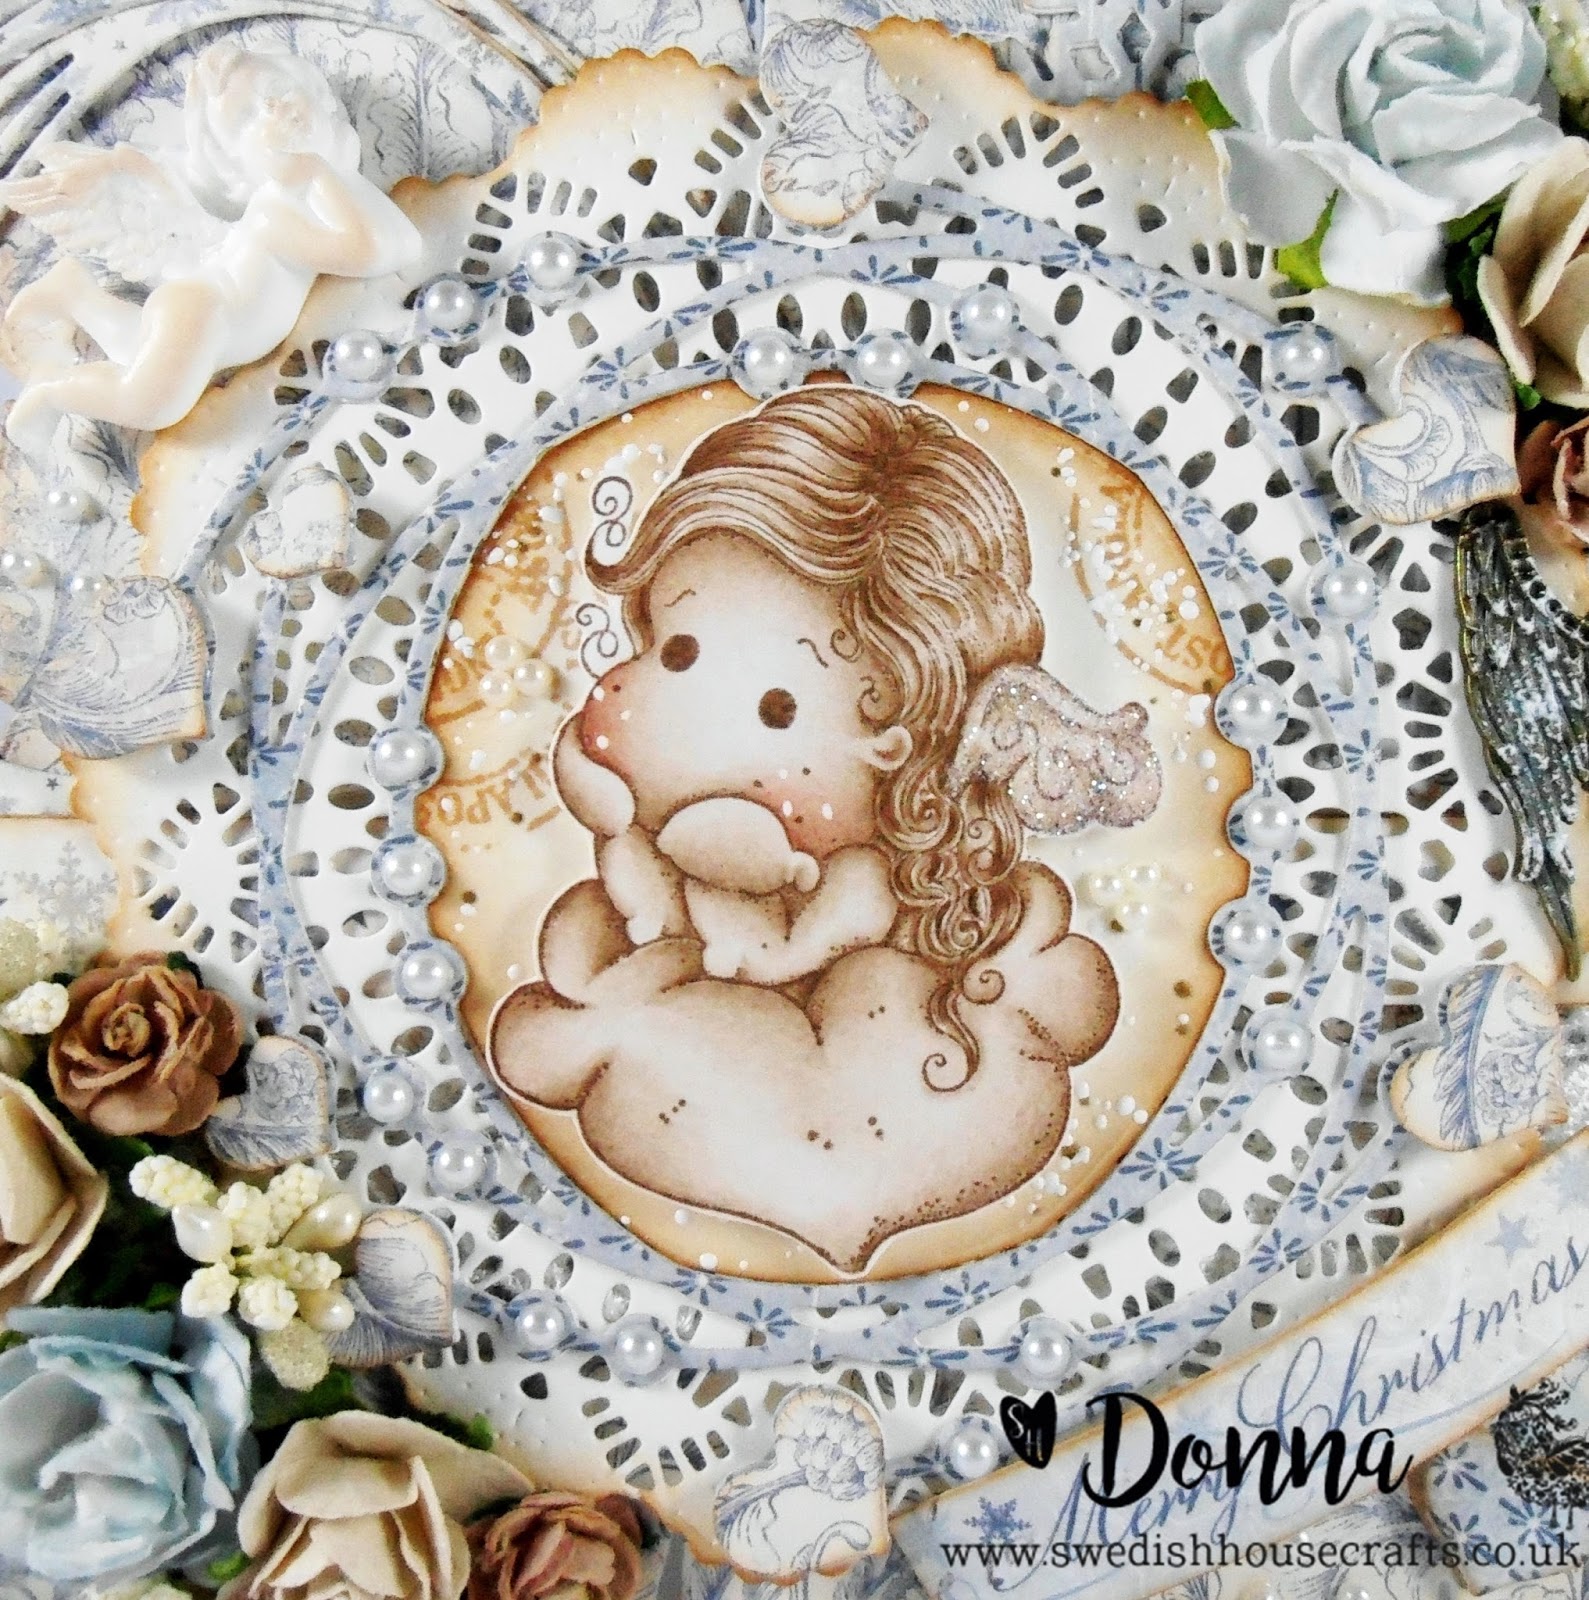
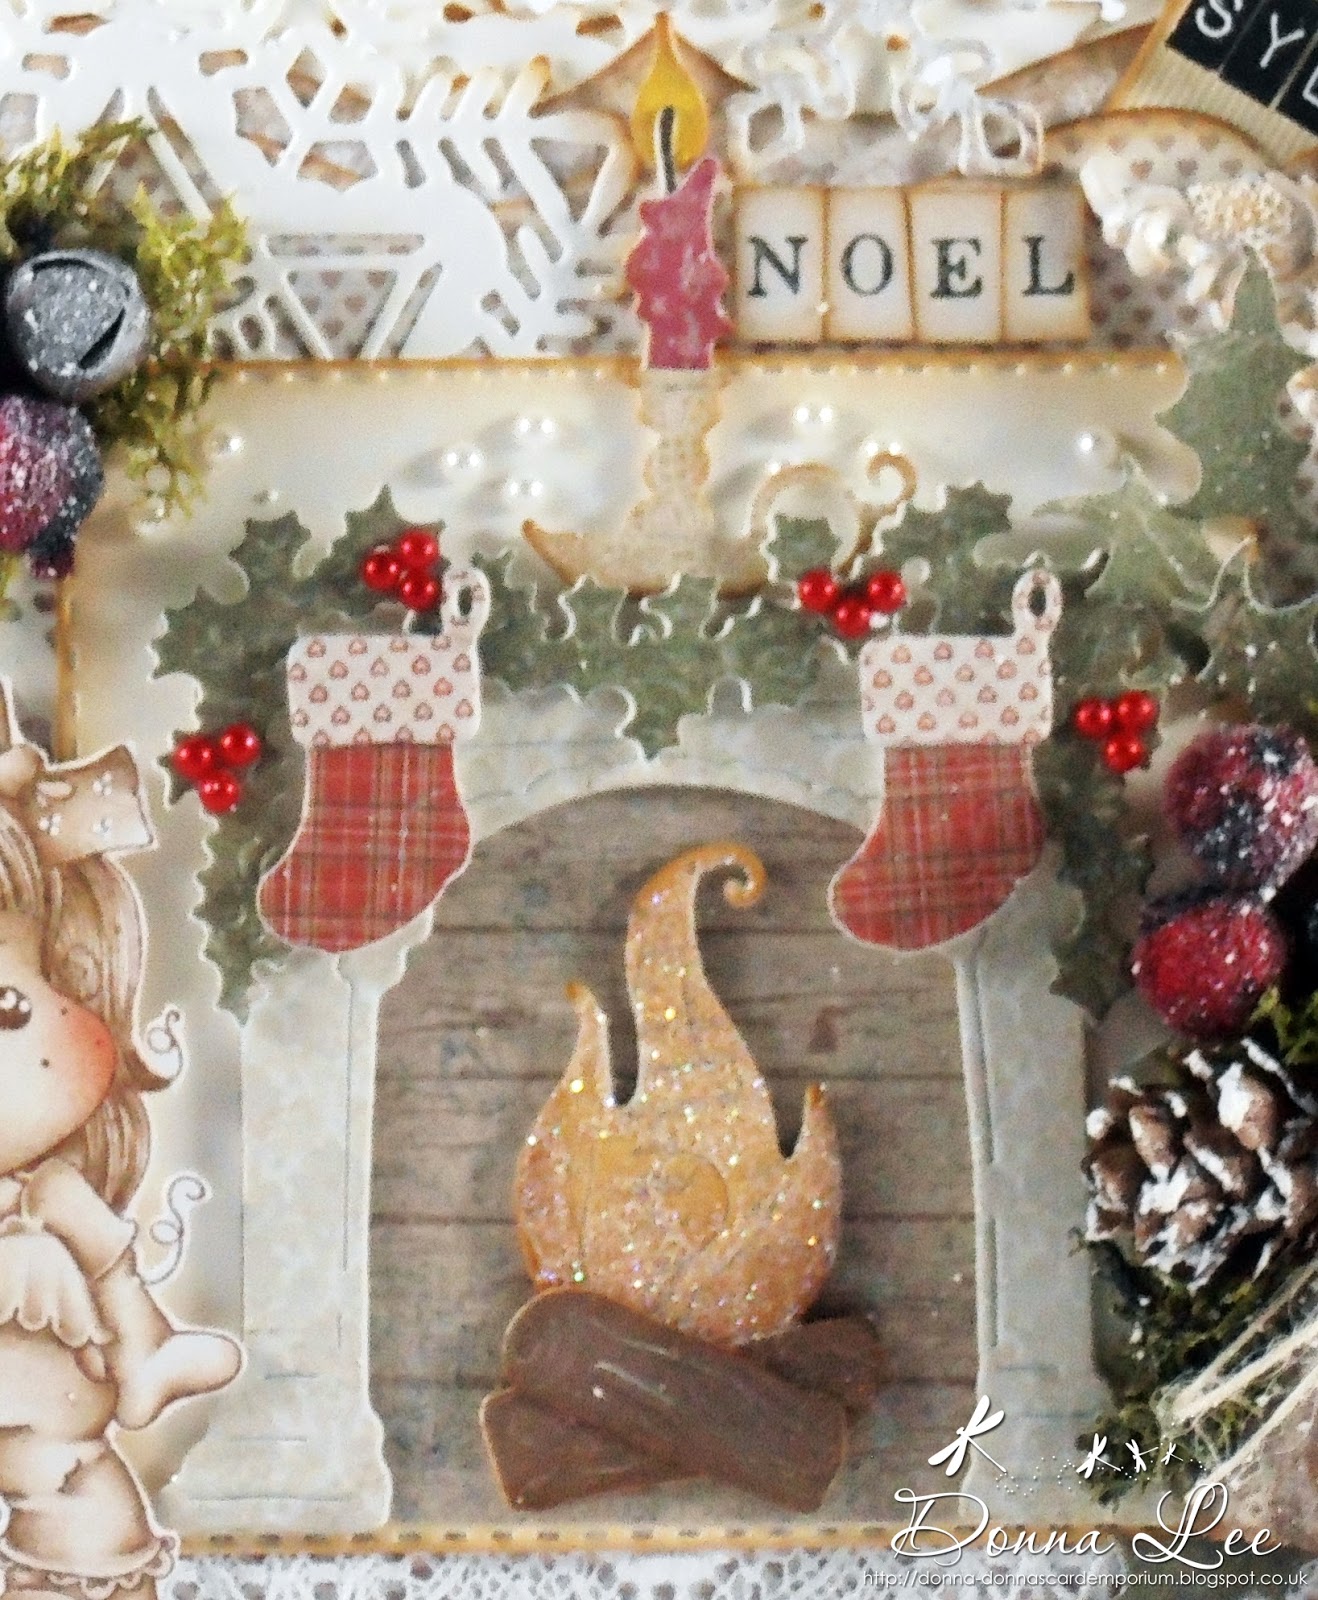
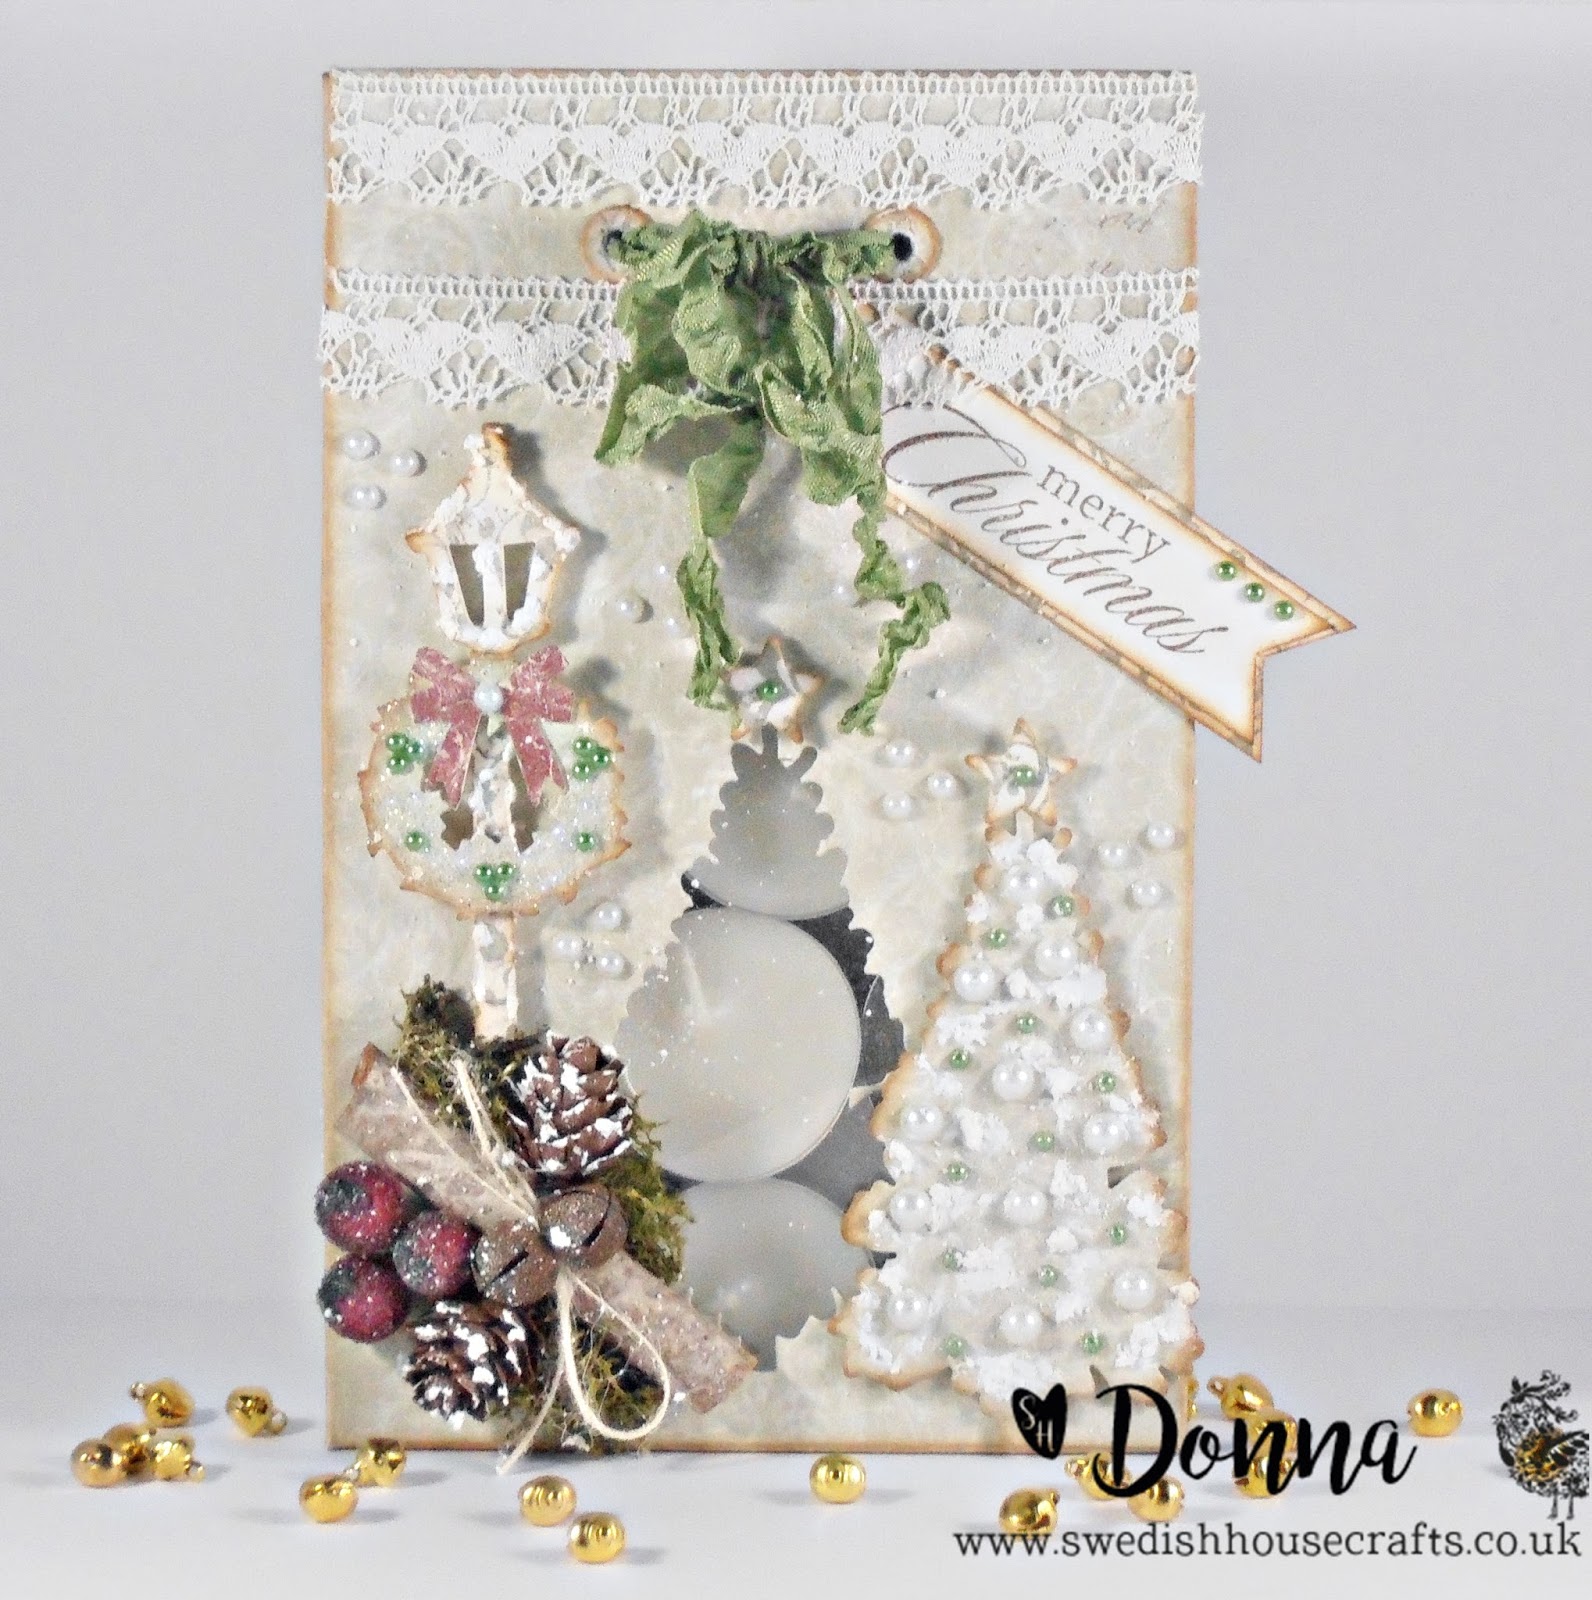
Myself, and a couple of the other DT ladies are featuring a few cards over on Swedish House Crafts blog today to celebrate the festive season.
 We have used some gorgeous products on our cards available from the store

Links to the products that I have used from Swedish House Crafts are in text, and can be found underneath each card that I have made.

Before I share my Christmas cards, I would like to tell you about the amazing discounts that are in store from December 24th 2017 until January 6th January 2018.

GUMMIAPAN dies, and stamps 30% off with code; GUMMIAPAN30

MAGNOLIA stamps, and dies 15% off with code; MAGNOLIA15

MAJA DESIGN all Christmas papers 25% off, min order order £10 with code; GET25

PION DESIGN Christmas papers 50% off the half price with code; GET50

EVERYTHING 20% off min order £25 with code; EVERYTHING20

OR FANCY WORLDWIDE FREE SHIPPING? 
Use code; FREE18 (min order £20)

THERE WILL BE NO SHIPPING DURING THE ABOVE MENTIONED PERIOD, SHIPPING STARTS ON MONDAY 8TH JANUARY 2018

Fancy some of those items? Go and grab the discount that suits you! 
You can use one discount at a time

If you have an account? Have you checked it lately? 
Santa had some store credits, and randomly left you a present! Check if that was you?

That's the exciting bit out of the way.
Now onto my 4 cards. 


Remember there is 5% off for the rest of December on the design team members product picks.
Visit their blogs or Swedish House Crafts blog to see what products they have used throughout December, and pick up the code.

Click onto my chosen product picks HERE to receive your 5% off (new Roxstamps heart wreath is one of my chosen products)

All that's left for me to say is...............................

MERRY CHRISTMAS & A HAPPY NEW YEAR!


Thursday 14 December 2017

Swedish House Crafts - Cloudy Love Tilda Christmas Card


Hello, everyone!

I'm here with another creation for the Swedish House Crafts blog. 
I have made another Christmas card.

I used a couple of the new Roxstamps dies on my card. They are so delicate. They cut beautifully through my eBosser, and are great value for money.

Links to the products are in text, and can be found at the end of my post along with a special surprise for you!


I used Gummiapan old paper die to cut the base of my card, and layer the papers which are Maja Design "Joyous Winterdays" new collection. For the top of the card I used the new Roxstamps Curlicue edge decor die.

I used Tim Holtz Vintage photo distress ink to ink the edges of everything on my card apart from the arrangement.


I used the new Roxstamps heart wreath die to cut Joyous Winterdays chilly papers, and adhered it to the centre of the card on top of the doily.

I wanted to add some dimension to the hearts, so I decided to die cut the heart wreath again using the reverse of the paper, cut off the hearts, and adhere them one on top of the other with 2mm foam pads. I embellished the circles on the heart wreath with 5mm white pearl flatbacks


Cloudy Love Tilda is coloured with Polychromos pencils. I used Gummiapan Angelpost stamp to stamp around the outside of the centre piece of the heart wreath, and inked the edges with Vintage photo distress ink. I matted the image to the centre using 2mm foam tape, then I used glamour dust on Tilda's wings to give them some sparkle.


Here you can see the smaller floral arrangement. The cream beaded berries are from the store. The mulberry flowers and bronze angel wings are from my stash.


A closer look at the larger arrangement.


Inside the card is decorated to complement the front.

Now for a little something special for you! If you would like to order any of the products that I have used on my card, our lovely lady boss Suha is giving 5% off these products throughout December.
All the links to the products that I have used are listed below.
This is the code that you will need to enter, and get your 5% discount.

CF14E4F7N8L0F

Thank you for stopping by to visit today, and huge thanks for all the lovely comments that you so kindly take the time to leave.


Sunday 10 December 2017

Christmas Heart Tilda - A New Challenge At LHOSM

Hello, lovely blogger friend's.
I hope you are well?

It's time once again for a new challenge over on the Lovely Haenglar or Sweet Magnolia blog
This is our final challenge of 2017
Our month long challenge theme is......................ANYTHING GOES
Our wonderful sponsor is The Rubber Buggy

I have made a Christmas card.

I used Christmas Heart Tilda from Magnolia A Lovely Christmas 2015 collection.

I coloured her with Polychromos pencils in sepia colours, and fussy cut around her.

I've also used some lovely dies from Doohickey club vol 17 Christmas/Winter on my card 😊

Suha, the store owner at Swedish House Crafts has one left to buy. So if you are interested in buying this gorgeous selection of Christmas/Winter dies, you can buy them HERE plus if you enter code DONNASAID5OFF at the checkout this will entitle you to 5% off your purchase of Vol 17. 
You can also use the code if you want to pre order Vol 18 or 19. How fab is that?

Here is my card


For the shape of my card I used KoKreate large frame frilly #2, and Maja Design "Home for the Holiday's papers.
Other dies used are Marianne Design Anja's Vintage decoration, Sizzix "On the Edge" snowflurries, Joy Crafts Ice crystal, and magnolia Doohickey bloomy tag.

I have inked the papers, and die cuts with Tim Holtz Vintage photo distress ink.


I created a fireplace scene using the new dies from Vol 17 Christmas/Winter.
I added 3mm red s/a pearl flatbacks to the garland, and added glamour dust to the flame.
I used 2mm foam tape behind all the die cuts to give a lovely 3D effect.

I used some sticky alphabet letters to spell the word NOEL.


For the Festive arrangement I used green moss, a cinnamon stick, pine cones, and wine coloured pomegranate apples.
I used Sizzix holiday greens to die cut the holly, and place it between the arrangement.


A closer look at Christmas Heart Tilda.
I have dotted her eyes with a white gelly roll pen, and used glamour dust on the heart to make it all sparkly.


Inside the card is decorated.

We would love you to come and join in with our current challenge.

Please remember that It's magnolia or Haenglar images only, and follow the theme.

The challenge closes on Friday, 5th January 2018.

My teamies have deigned some gorgeous creations.
Why not pop over HERE for a peek?

I'm entering my card into the following super challenge's;

Thank you for stopping by to visit today, and huge thanks for all the lovely comments that you so kindly take the time to leave for me to read.

I'll  be back on Thursday.

Crafty hugs


Wednesday 29 November 2017

Afternoon Tea Day Three - A Gift Bag tutorial To Hold 12 Tea Lights

Hello, lovely blogger friend's.

I'm here with my third, and final picture tutorial this week for Swedish House Crafts blog.
 This time I have made a gift bag to hold 12 tea lights.

(If you don't have tea lights you could fill the bag with treats or a gift?)


Above is my completed tea light gift bag.

To make the bag, I used Maja Design "Joyous Winterdays" Outdoors 12" x 12" paper.


The pretty lace, pearls, and crinkled seam binding are from my stash.

The die cut lamp post is the new Tim Holtz Sizzix Bigz die.


In the above picture, you can see the side of the bag.


I used the die cut Christmas tree that was left over from the centre of the bag, and inked the edges with Tim Holtz Vintage photo distress ink.

I decorated the tree with 8mm, and 3mm white, and green pearl flatbacks.

I coated the tree with Snow -Tex.


For the arrangement I used a cinnamon stick tied with twine, and rusty jingle bells on top of a bed of green moss from my stash.

The wine coloured pomegranate apples, and wooden pine cones are from the store.

The arrangement is coated with Snow - Tex.

To make the gift bag, you will need;
Maja Design "Joyous Winterdays" paper
A die cutting machine that takes A4 card/paper
A score board, and a scoring tool
paper trimmer
Scissors
Hole punch
Pencil
Ruler
Glue
Acetate
Gummiapan Christmas tree die
12 tea lights, treats or a gift.

The tutorial.


Cut a piece of Maja Design "Joyous Winterdays" paper to measure 29cm x 25.5cm


Position the paper landscape on the scoring board, and score at 1cm, 3cm, 22cm, 24cm.


Position the paper portrait, and score at 1cm, 3cm, 22cm, 24cm.


Keeping the paper portrait, you will need to score between the 1cm, and 3cm score line, and repeat again between the 15cm, and 17cm score line as shown above.


Position the paper landscape, and using a pencil draw a triangle in each of the rectangle boxes, and using a scoring tool, score on top of the lines. Rub out the pencil lines.


The above photo is how the triangles should look.


Keeping the card portrait, with the triangles at the top. Cut out the areas as shown above.


Next, cut the areas as shown at the top, and cut up to the second score lines at the bottom to make the tabs either side.


use a rounded corner punch to round the top, and bottom tabs.


Position the Gummiapan Christmas tree die onto the paper with low tack adhesive tape, and run through your die cutting machine.


If you are using a die cut machine that takes A4 card, you will need to fold over the score lines top, and bottom of the tree before running it through.


Fold in all the other the score lines. The triangle score lines should be folded inwards.


Turn the paper over, and adhere a piece of clear acetate over the die cut tree.


Measure 2cm down from the second score line at the top, and using a hole punch, punch 2 evenly spaced holes. The holes are to thread a piece of ribbon through, and tie into a bow.


Using distress ink, Ink the edges along the folded score lines.

I used Tim Holtz Vintage photo distress ink.

The bag is now ready to assemble


This is how the bag should look when assembled.

Decorate the bag how you wish!

I hope that I have inspired you to make a gift bag?

Links to the products that I used from Swedish House Crafts are listed below.

Crafty hugs.


Tuesday 28 November 2017

Afternoon Tea Day Two - Pillow Box Tutorial

Hello, lovely blogger friend's.

I'm back with day two's picture tutorial that I have made on Swedish House Crafts blog.

The pillow box is super easy to make, and is perfect for holding treats, or a small gift.

I used some lovely products from Swedish House Crafts store.

Links to the products can be found in text at the end of my post.


Here is a picture of my completed pillow box.

The papers are Maja Design 12" x 12" "Joyous Winterdays" Christmas Time.

The Merry Christmas sentiment is Gummiapan.

I stamped the sentiment onto white card, cut it out, and matted it onto a strip of design paper.

The gold ribbon is from the store, and the white lace that I have adhered on top of the ribbon is from my stash.


I used Roxstamp stitched circle die to cut the design paper, and stitched around the outside with a length of red embroidery thread.

I stamped Gummiapan Santa image onto Bristol board extra smooth cardstock, and cut it out using Gummiapan matching Santa die.

I coloured the image with Polychromos pencils.

I used glamour dust on the pom pom of Santa's hat, and a thick coating of Snow - Tex for his beard.

On to the tutorial.


You will need; A score board or a scoring stylus. paper trimmer, card, pencil, ruler, scissors, glue or sticky tape, and a CD.


Cut a piece of card to measure 17cm x 17cm.


Position the card on the score board, and score at 1cm, and 9cm.


Fold in the score lines.


Fold over the card completely, ensuring the 1cm tab is inside.


Position the CD as shown above ensuring it's lined up, and with a pencil draw around it.
You will need to do this both ends.


This is how it should look.


Cut around the pencil lines as shown above.


Open out the card and cut off the two edges around the score line.


To make four curved fold lines, position the CD so it overlaps where the centre score line and tab score line end.


This is what the four curved fold lines should look like.


With a pencil draw half circles ensuring they are central.
You can do this by making a mark with a pencil half way from the centre score line. Around 4cm.


Cut around the the circle lines.


Fold the box in half, and adhere the tab with glue making sure it's inside the box.
When the tab is completely dry. Fold in the ends.


This is how the pillow box should look when completed.

I hope that I have inspired you to have a go at making a pillow box?

Links to the products that I have used can be found below.

Thank you for stopping by!

Hugs