
Good evening, crafty blogger's.
I have made a cute little mailbox featuring Merry Christmas Tilda from the new Winter Wonderland 2013 collection.
You can find the templates and video for the mailbox Here
Last year I made the larger mailbox and made a tutorial which is picture heavy.
You can find my tutorial Here
I'm still on cloud 9! Lol!!!
Here is my cute little mailbox


I'm still on cloud 9! Lol!!!
Here is my cute little mailbox

I made the mailbox with 300gsm white Conqueror card.
The gorgeous papers are Magnolia "A Christmas Story" On Christmas Day.
I love the sentiment on the papers. It reads:
Tender Memories
Wake And Say
"Forget -Me- Not"
On Christmas Day
I have inked the edges of the papers with Tim Holtz "tea dye" distress ink and Frantaged 2 Sizzix On The Edge Snow Flurries die cuts by Tim Holtz with shabby white embossing enamel placing them between the papers each side on the front of the box.
The Frantage is from Live & Love Crafts
I used Neenah cardstock to die cut a Spellbinders beaded oval and stamped Merry Christmas Tilda onto it with Memento "rich cocoa" ink.
I coloured Tilda with Polychromos pencils and surrounded the image with Frantage shabby white embossing enamel.
I inked around the beaded oval with "tea dye" distress ink.
I die cut a Spellbinders floral oval and frantaged around the outside of the frame with shabby white embossing enamel placing the image onto the floral oval frame with sticky pads and adhered it to the centre of the box.
The poinsettias are Marianne Design and I inked the edges with "tea dye" distress ink.
The frosted berries in the centres are from Live & Love Crafts
The green pine branches are by Cheery Lynn and the white woodland branches are by Martha Stewart.
The snowflakes are Magnolia Doohickey. I have frantaged them with shabby white embossing enamel and placed a 5mm white pearl onto their centres.
The snowflake charm is from The Ribbon Girl
I have Frantaged the charm and hung it with some white cotton perle.

The sentiment is a freebie from Birdscards. I cut it out and matted onto a smaller Spellbinders floral oval and inked around the edges with "tea dye" distress ink.
The white rose organza trim is from Live & Love Crafts and the flowers are from Wild Orchid Crafts
I used the pine branches, woodland branches and frosted berries for the arrangement too.
I have coated the arrangement with Snow-Tex from Live & Love Crafts

On each side of the mailbox I have placed magnolia Doohickey slender firs.
I inked the edges of the firs with "tea dye" distress ink and coated them with Snow-Tex.
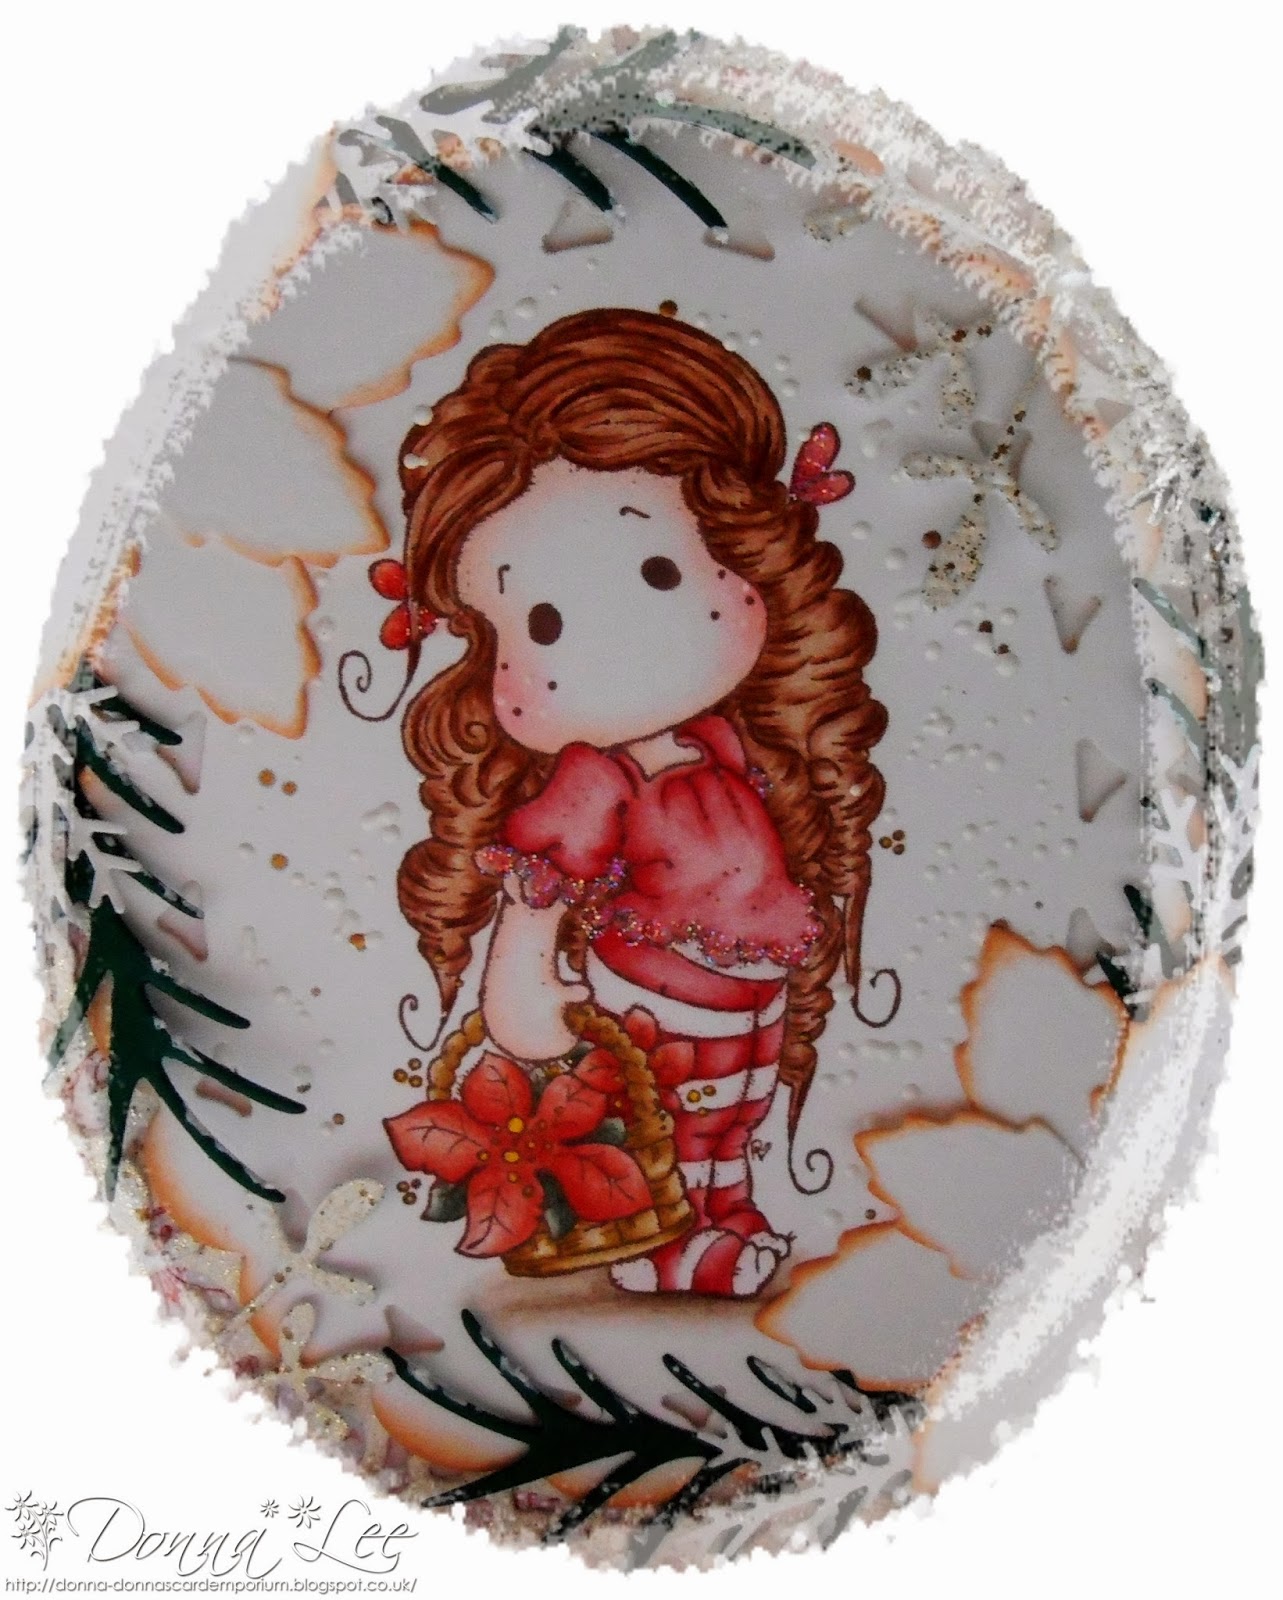
A close up of adorable Merry Christmas Tilda.
I used ArtDeco Glamour Dust on Tilda's dress and dotted her cheeks with Inkssentials opaque white pen.
I hope you like my cute little mailbox?
Why don't you have a go at making one?
I am entering my creation into the following super challenges:
Thank you for stopping by to visit my blog today and big thanks for all the lovely comments I receive
They make me very happy.
Crafty hugs.
Donna x
This is so adorable! Just perfect! Thanks for joining us at Magnolia-licious and hope to see you again next time!
ReplyDeleteBeautiful creation, fabulous details. Thanks for joining us at Tilda's Town for our challenge
ReplyDeletehugs Louise
Beautiful card! Great colours too!
ReplyDeleteThank you for taking part in the Tilda's Town challenge blog this week. Hope to see you again soon!
Hugs,
Tamara
Gorgeous Christmas card. Love the die cuts you've used. Thanks for joining us at Tilda's Town. Hugs Babi
ReplyDeleteOh, Donna this is gorgeous! love the fab design, what a wonderful Idea for the x-mas cards. Beautiful coloring! Wishing you a wonderful weekend, sweetie! Hugs, Elizabeth x
ReplyDeleteVery pretty box and your image is colored beautifully, thanks for joining us at Simply Magnolia
ReplyDeletehugs Louise
Beautiful little creation using one of my favorite Tildas. Wonderfully colored & thanks for the tutorial on the little mailbox. I shall give it a try ...
ReplyDeleteJanie
Hi Donna wow this is so cool will try out your tutorial on my week off ! ...I just love her red hair ...so many great details ..love the trees at the side too :) looks great fun to make :)
ReplyDeleteHi Donna wow this is so cool will try out your tutorial on my week off ! ...I just love her red hair ...so many great details ..love the trees at the side too :) looks great fun to make :)
ReplyDeletethis mailbox is so cute!!
ReplyDeletethanks for joining us at Deep Ocean challenge!
hugs
Nicoletta