Sunday, 10 November 2013

Edwin With Airplane.

Good morning, crafty bloggers.
I hope you are well?
I was asked to make a card for a little boy named Charley for his Birthday.
Here is what I did.
 
 
I stamped Edwin With Airplane onto Neenah cardstock with Memento black ink and coloured the image with Polychromos pencils.
I have surrounded the image with Frantage shabby white embossing enamel from Live & Love Crafts and matted it onto Woodware recycled cardstock.
The papers are Maja Design "Walking In The Forest" from Dies To Die For.
I have distressed the edges of the papers with a Tim Holtz paper distresser and matted them onto Woodware recycled card.
The blue and white twine and 5mm white pearls are from The Ribbon Girl
The wooden star buttons are from Fantastic Ribbons. I have tied a piece of twine through the buttons.
I placed a piece of cheese cloth behind the image before adhering it to the card with sticky pads.
The helicopter die cut is from Tracy at Dies To Die For. She sends samples every time I shop but, I cannot find it on her website. Sorry! I have Frantaged it with shabby white embossing enamel and adhered a 2mm tan pearl to the centre of the rotor.
I have computer generated the sentiment in word using Harrington font 16 and added some shabby white embossing enamel.
I matted the sentiment onto Woodware recycled card.


Inside the card is decorated.
 
 
Here is a close up of Edwin With Airplane.
I dotted Edwin's cheeks with an Inkssentials opaque white pen.
 
I hope you like my card?
 
 
I am entering my card into the following super challenge:


Thank you for stopping by and big thanks for the lovely comments that I receive.
Crafty hugs
Donna xx


Wednesday, 6 November 2013

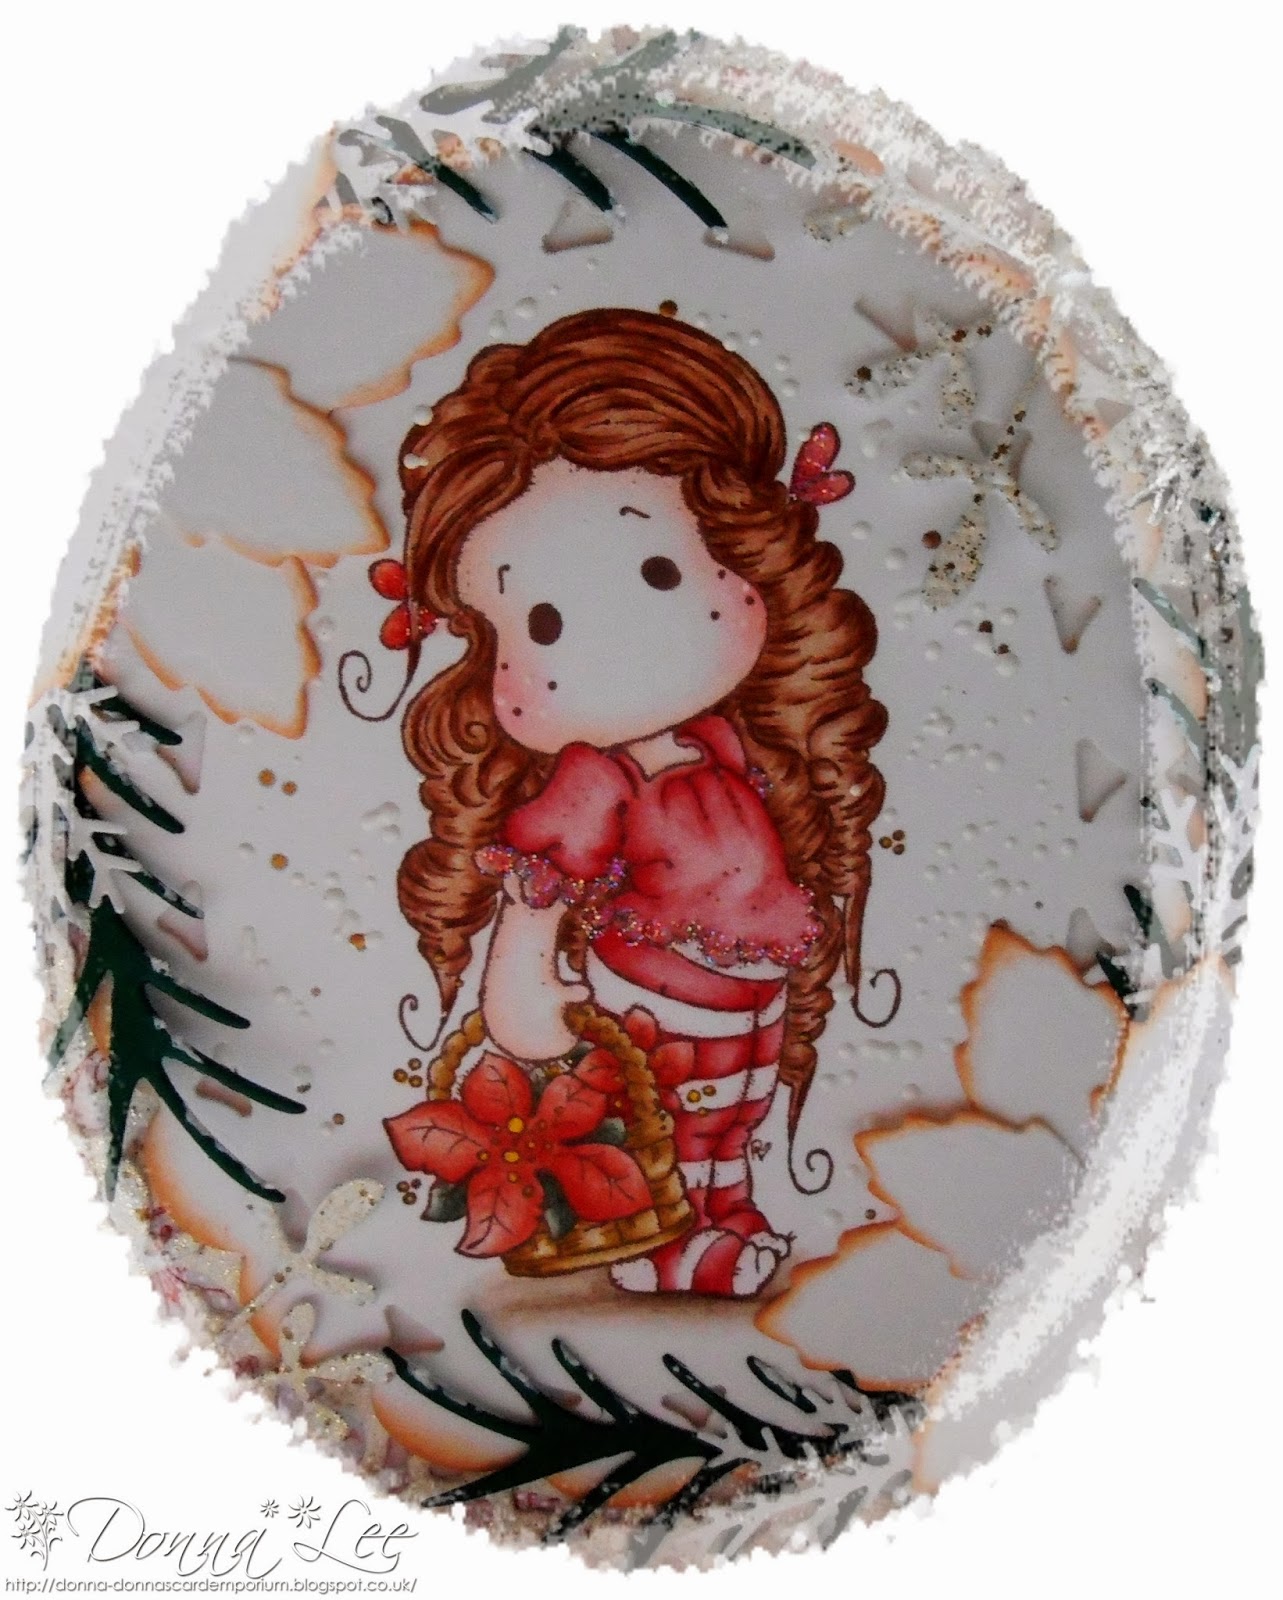
Merry Christmas Tilda and A Cute Little Mailbox.

Good evening, crafty blogger's.
I have made a cute little mailbox featuring Merry Christmas Tilda from the new Winter Wonderland 2013 collection.
You can find the templates and video for the mailbox Here 
Last year I made the larger mailbox and made a tutorial which is picture heavy.
You can find my tutorial Here

I'm still on cloud 9! Lol!!!

Here is my cute little mailbox


I made the mailbox with 300gsm white Conqueror card.
The gorgeous papers are Magnolia "A Christmas Story" On Christmas Day.
I love the sentiment on the papers. It reads:
Tender Memories
Wake And Say
"Forget -Me- Not"
On Christmas Day
 
I have inked the edges of the papers with Tim Holtz "tea dye" distress ink and Frantaged  2 Sizzix On The Edge Snow Flurries die cuts by Tim Holtz with shabby white embossing enamel placing them between the papers each side on the front of the box.
The Frantage is from Live & Love Crafts
I used Neenah cardstock to die cut a Spellbinders beaded oval and stamped Merry Christmas Tilda onto it with Memento "rich cocoa" ink.
I coloured Tilda with Polychromos pencils and surrounded the image with Frantage shabby white embossing enamel.
I inked around the beaded oval with "tea dye" distress ink.
I die cut a Spellbinders floral oval and frantaged around the outside of the frame with shabby white embossing enamel placing the image onto the floral oval frame with sticky pads and adhered it to the centre of the box.
The poinsettias are Marianne Design and I inked the edges with "tea dye" distress ink.
The frosted berries in the centres are from Live & Love Crafts
The green pine branches are by Cheery Lynn and the white woodland branches are by Martha Stewart.
The snowflakes are Magnolia Doohickey. I have frantaged them with shabby white embossing enamel and placed a 5mm white pearl onto their centres.
The snowflake charm is from The Ribbon Girl
I have Frantaged the charm and hung it with some white cotton perle.


The sentiment is a freebie from Birdscards. I cut it out and matted onto a smaller Spellbinders floral oval and inked around the edges with "tea dye" distress ink.
The white rose organza trim is from Live & Love Crafts  and the flowers are from Wild Orchid Crafts
I used the pine branches, woodland branches and frosted berries for the arrangement too.
I have coated the arrangement with Snow-Tex from Live & Love Crafts


On each side of the mailbox I have placed magnolia Doohickey slender firs.
I inked the edges of the firs with "tea dye" distress ink and coated them with Snow-Tex.


A close up of adorable Merry Christmas Tilda.
I used ArtDeco Glamour Dust on Tilda's dress and dotted her cheeks with Inkssentials opaque white pen.
 
I hope you like my cute little mailbox?
Why don't you have a go at making one?


I am entering my creation into the following super challenges:


Thank you for stopping by to visit my blog today and big thanks for all the lovely comments I receive
They make me very happy.
 
 
Crafty hugs.
Donna x


Saturday, 2 November 2013

A Christmas Stocking & Some News!!!

Good afternoon, crafty bloggers.
Oh, there's so much excitement in my house today.
In September I made a Christmas stocking to enter into Magnolia Ink's magazine contest and guess what? When the magazine arrived this morning I saw that I had won! Yes.................. I am  a winner!
I am so thrilled to have been picked.
It's the little things in life that make me happy and this really has. Lol!!!
 
Here is my stocking.


I have coloured Tilda With Little Rudolf with Polychromos pencils and cut around the image.
The stocking template is from Sandra's Scrapshop.
I have used Woodware recycled card to make the stocking base and the papers are Maja Design
 "It's Christmas Time."
I used shabby white frantage from Live & Love Crafts onto Noor Designs "Winter Wishes" snowflake die cuts and placed them between the papers.
I inked the edges of the papers with Tim Holtz "tea dye" distress ink.
The pretty lace is from The Ribbon Girl
The slender firs and snowflakes are Magnolia Doohickey dies.
I have inked around the edges of the slender firs with tea dye distress ink and sprayed them with Crafters Companion Spray & Sparkle and added some Rangers icicle stickles to give snow effect.
I have frantaged the snowflakes with shabby white embossing enamel and place a 5mm white pearl onto each of them. The pearls are form The Ribbon Girl
I have hung the gold jingle bells from Cuddly Buddly with DMC N0 8 white cotton Perle.
I made the bow with 15mm white satin edged organza ribbon from Fantastic Ribbons and tied 2 jingle bells to the centre. The 15mm white rose above the bells is from Wild Orchid Crafts.
Once I had placed Tilda With Little Rudolf onto the centre of the card with sticky pads I added 3mm pearls randomly around the scene.


Inside the card is decorated


I used Sizzix Bigz Tattered Poinsettia die cuts and inked the edges with tea dye distress ink. I coated the leaves with Ranger glossy accents and sprinkled them with Twinklets Diamomd Dust.
I coloured the stamens in the centre with a holly green Promarker.
 
 
A close up of adorable Tilda With Little Rudolf.
I have added ArtDeco glamour dust to Tilda's hat trim. pom~pom, waistcoat and trim on her dress.
I dotted Tilda and Rudolf's cheeks with an Inkssentials white opaque pen.


Proud as punch!!!
 
 Enjoy the weekend.
Thanks for stopping by and thanks for all your lovely comments.
 
Crafty hugs.
 
Donna x


Tuesday, 29 October 2013

Sitting Witch Tilda.

Good morning, crafty bloggers.
Welcome to my two new followers and thank you ladies.
I hope everyone is well?
 
I really wanted to make a card to celebrate Halloween.
I don't really have much in the way of spooky papers and embellishments but, Sitting Tida Witch has been waiting patiently in among my collection of Magnolia stamps to be bought to life! Lol!!!
So here is what I have come up with.........................
 
 
I have made the 6"x6" card base with 300gsm white Conqueror card.
The papers are Maja Design "Walking In The Forest" from Dies To Die For.
I have lightly sanded the edges of the papers and matted them onto Woodware recycled card.
The white doily and pretty lace are from Ebay.
I stamped Sitting Witch Tilda with Memento "rich cocoa" ink onto Neenah cardstock and cut the image out using a Spellbinders decorative labels one. I have coloured her with Polychromos pencils. I surrounded the image with Frantage shabby white embossing enamel from Live & Love Crafts and inked around the label with Tim Holtz "tea dye" distress ink.
The large brown flower is from Wild Orchid Crafts. I have inked the edges of the flower with a white ink pad.
The brad in the centre of the flower was sent to me by my super bloggy friend. I have attached some silver plated curb chain and rings to hang the pumpkin charm. I can't remember where I bought the charm from?
The sentiment is a freebie from Birds Cards.
I have printed the sentiment onto white card and used a Spellbinders beaded oval to cut it out. I inked around the edges with Tim Holtz "tea dye" distress ink and added some tiny white pearls.
The Victorian picket fence is by Cheery Lynn. I have cut the fence with Woodware recycled card.
 
 
For the flower arrangement I have used Kort & Godt white rolled roses from Live & Love Crafts and a 25mm curly white rose, 15mm orange roses and 15mm brown roses all from Wild Orchid Crafts.
I have placed a 5mm tan pearl onto the centre of the rolled roses. The pearls are also from
In between the arrangement I have place some white punched branches which I have inked the edges with Tim Holtz "tea dye" distress ink.
The Woodland branch punch is a Martha Stewart punch.
 
 
A close up of the pumpkin charm.
 
 
A close up of Sitting Witch Tilda.
I have added ArtDeco Glamour Dust to her bow in her hair and the edge of her dress.
I dotted Tilda's cheeks with an Inkssentials opaque white pen.
 
 
Finally...................
I have decorated inside the card to compliment the front.
 
 
I hope you like my card?
 
 
I am entering my card into the following super challenges;


Thank you for stopping by to visit and a big thanks for all the lovely comments.
They make me so happy.
Happy Halloween!
Enjoy the rest of the week.
 
Crafty hugs
Donna x


Friday, 25 October 2013

Tilda In Winter Night.

Hello, crafty bloggers.
I hope you are well?
I have made another Christmas card. A shaped card. This time featuring Tilda In Winter Night.


I have used GoKreate large frames frilly#2 to make the shaped card with 300gsm white Conqueror card and also used the frames to cut out the papers.
The papers are Maja Design "It's Christmas Time."
I have sanded around the edges of the papers. 
I used Neenah cardstock to cut out a Spellbinders floral oval and stamped Tilda In Winter Night onto it with Memento rich cocoa ink.
I have coloured Tilda In Winter Night with Polychromos pencils and Frantaged around the image with shabby white embossing enamel from Live & Love Crafts. I inked around the edge of the floral oval with Tim Holtz "Tea Dye" distress ink.
I placed some cheese cloth behind the image before adhering it with sticky pads to the centre of the card.
I have inked a couple of the smaller Doohickey spruce firs with "Tea Dye" distress ink and painted on some Snow~Tex from Live & Love Crafts.
The 5mm white pearls are from The Ribbon Girl.
The sentiment is from Lili Of The Valley.  I have inked around it with "Tea Dye" distress ink.
 
 
I have used shabby white embossing enamel on a Cheery Lynn snowflake 5 die cut and hung silver plated curb chain and rings from the back of the brad onto a metal lantern charm.
The brad is from my super bloggy friend and the charm is from Live & Love Crafts.
The flower arrangement consists of a 25mm  green rose and 10mm white roses from
The 20mm white roses are from The Ribbon Girl. I have put a tiny red pearl on the centre of each of the roses and painted Snow~Tex onto the flowers.
I have inked the edges of some woodland branches with "Tea Dye" distress ink and placed them between the arrangement.
The woodland branch punch is by Martha Stewart.
 
 
A close up picture of Tilda.
I have added ArtDeco Glamour Dust to Tilda's fur trim on her coat, hat trim and pom~pom.
I used an Inkssentials opaque white pen to dot Tilda's cheeks.
 
 
I have decorated inside the card to compliment the front with the paper and a Spellbinders floral oval which I have inked around the edges with "Tea Dye" distress ink.
 
I hope you like my card?


I am entering my card into the following super challenges.


 I see I have a new follower. welcome and thank you.
Thanks for stopping by and thank you for your lovely comments. They make me so happy.
Have a lovely weekend.
 
crafty hugs
Donna x


Sunday, 20 October 2013

On The Road Tilda.

Hello, crafty bloggers.
I'm back again with another card.
I couldn't resist colouring On The Road Tilda inspired by the song "I want to ride my bicycle" (Bicycle Races) by Queen. Whenever I see her I burst into song. Lol!!!
 
I have used pretty pinks as October is breast cancer awareness month.
Here is my card


I have made the base card with 300gsm white Conqueror card.
The pretty papers are Maja Design "Sofiero" from Dies To Die For. I have distressed the edges of the papers and matted them onto Woodware recycled card.
The pretty daisy lace at the top of the card is from The Ribbon Girl and the lace across the middle is from Ebay.
 
I used Neenah cardstock to die cut a Spellbinders decorative labels one and stamped
 On The Road Tilda  with Memento "rich cocoa" ink onto it.
I have coloured the image with Polychromos pencils.
I have inked around the edges of the decorative label with Tim Holtz "Spun Sugar" distress ink and surrounded the image with Frantage shabby pink embossing enamel from Live & Love Crafts
The metal filigree corner is from Wil Orchid Crafts and the Pippi butterfly is Memory Box.
I have frantaged the metal corner and butterfly with shabby pink embossing enamel. The centre of the butterflies are coloured with a blossom pink Flexmarker.
The fence is called Victorian picket fence by Cheery Lynn. I have inked the edges of the fence with Tim Holtz "spun sugar" distress ink.
Can you see the Pippi butterfly on the fence?
 
 
The flower arrangement consists of a 25mm ivory from Wild Orchid Crafts
The 20mm pink roses, and cosmos daisies are from The Ribbon Girl The frosted berries are from
The woodland branches among the flowers is a Martha Stewart punch and the floral branch is Magnolia Doohickey. I have inked the edges with "Spun Sugar" distress ink.


A close up of On The Road Tilda.
I have added ArtDeco Glamour Dust to tildas bow on her hairband, frill on her sleeves, bows on her shoes and in between the flowers in the basket.
I have dotted Tilda's cheeks with a Inkssentials opaque white pen.


Inside the card has been decorated to compliment the front with Sofiero paper and a Spellbinders decorative label.
 
 
I hope you like my card?
 
 
I am entering my card into the following super challenges;


Thanks for stopping by and thank you for all the lovely comments.
They make me so happy.
 
 
Enjoy the rest of the weekend.
 
Crafty hugs
Donna x


Thursday, 17 October 2013

Gucci Tilda.

Good afternoon, crafty bloggers.
I have had quite a few orders to make cards for the next month so I am going to be very busy. I have also sold seven cards in my Etsy shop which I am so thrilled about as The first lot that I put on there  five months ago didn't sell at all.
This card that I have made is the first of my orders. I have made it for a young lady called Katie.
It's a shaped card featuring Gucci Tilda. Perfect for a teenager!
 
Here is the card

 
I have used GoKreate large frames frilly#2 to make the shaped card with 300gsm white Conqueror card and also used the frames to cut out the papers.
The pretty papers are Maja Design "Sofiero" from Dies To Die For.
I have sanded around the edges of the papers.
The white doily is from Ebay.
The gorgeous lace is from The Ribbon Girl and the white vintage metal corner which I have frantaged is from Live & Love Crafts.
I used Neenah cardstock to cut out a Spellbinders beaded oval and stamped  Gucci Tilda onto it with Memento Mocha ink.
I have coloured Gucci Tilda with Polychromos pencils and Frantaged around the frame and image with shabby white embossing enamel from Live & Love Crafts
I used Sofiero paper to cut out a Spellbinders floral oval, sanded the edges and adhered the beaded oval onto it.
The sentiment is computer generated with Harrington Font 16.
I cut it out with a smaller Spellbinders floral oval for the sentiment.
I have added some shabby white embossing enamel around the edges and around the sentiment.


For the arrangement of flowers I used 25mm wild roses and 15mm white roses from
 The 20mm pink roses are from The Ribbon Girl. The white feathers and cute trendy handbag charm are from
I have painted a little Snow~Tex from Live & Love Crafts onto the flower arrangements.
The butterfly is Memory Box "Pippi." I have used shabby white embossing enamel to frantage it and coloured the centre with a blossom pink Flexmarker.


A close up picture of Gucci Tilda.
I have adhered a string of white 2mm beads from Live & Love Crafts round the image and added ArtDeco Glamour Dust to Tilda's belt, frill on her trousers and sunglasses in her bag.
I dotted Tilda's cheeks with a Inkssentials opaque white pen.


I have decorated the inside of the cad to compliment the front with Sofiero paper and a GoKreate frilly frame. I inked around the frilly frame with Tim Holtz "Spun Sugar" distress ink.
 
 
I hope you like my creation?
 
 
I am entering my creation into the following super challenges.


Thanks for stopping by and thank you for the lovely comments I receive.
 
Enjoy the rest of the week.
 
Crafty hugs.
 
Donna x